How to Upload Visitor Records
Import visitor records from other sources into GuestTrack using the bulk Import Records function — with Excel-like copy/paste and automatic data validation.

Some businesses may have the need to upload visitor records from other sources, in advance or afterwards, so that all records can be kept within the GuestTrack system. The Import Record function is designed to meet this need.
Import Steps
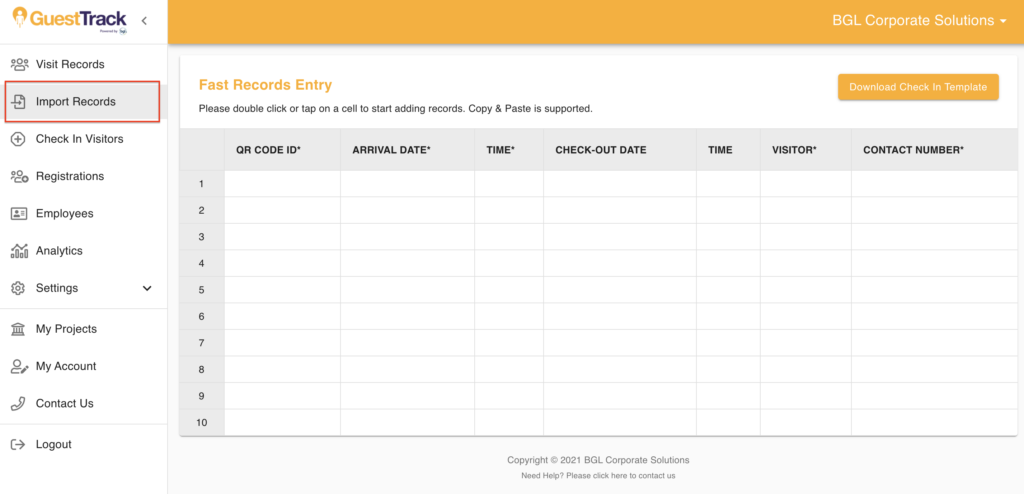
Step 1: Navigate to Import Records
Navigate to Import Records. The import table works the same as an excel sheet, which supports typing in, cut (Ctrl/Cmd X), copy (Ctrl/Cmd C) and paste (Ctrl/Cmd V) action.
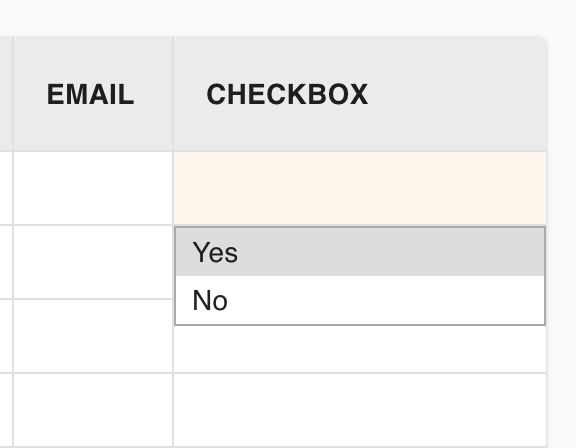
Step 2: Handle dropdown/checkbox fields
If there is a dropdown or checkbox field in your visitor form, double click the cell to see the available options.
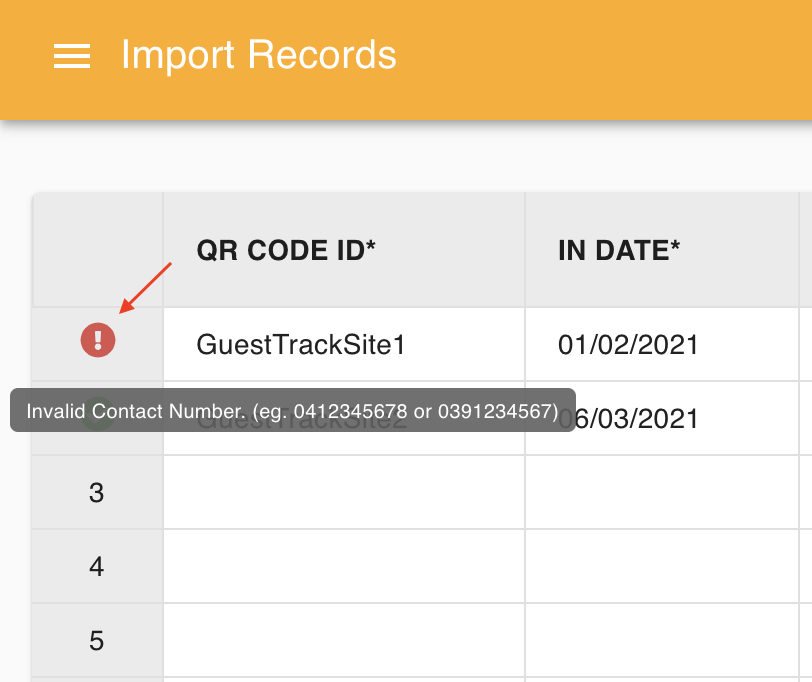
Step 3: Validate data
The table comes with auto data validation. Check for errors before uploading your records.
Step 4: Import
Click the Import Records button. The imported records can be viewed in the Visitor Record section.

Benefits
- Consolidate records - Keep all visitor data in one place
- Bulk import - Copy/paste from spreadsheets
- Validation - Auto-check for errors before import
- Excel-like interface - Familiar spreadsheet controls
- Pre-register - Import expected visitors in advance